The CLI for Microsoft 365 has been around for a while now. It’s a powerful tool that allows you to manage your Microsoft 365 tenant from the command line. It’s a great tool for automating tasks and managing your tenant more efficiently. In this post, I’d like to highlight a few features that make life even easier.
🔒 The concept of connections: simultaneously working with multiple accounts
The CLI boasts a multi-account feature. It’s possible to sign in with multiple identities, be it user accounts and/or applications, and easily switch between them. This is a great news for people who (like me) work with multiple tenants on a day-to-day basis. In the CLI, we call them ‘connections’, and this is how they work.
Working with connections is as easy as just signing in with the m365 login command. Each time you sign in successfully, your new connection is added to the list of connections you can work with. You can then switch between these connections using the m365 connection use command. To easily switch between connections, it’s possible to give them a name when you sign in or afterwards. This way, you can refer to them by name instead of having to remember the connection ID.
Step 1: sign in to my developer tenant
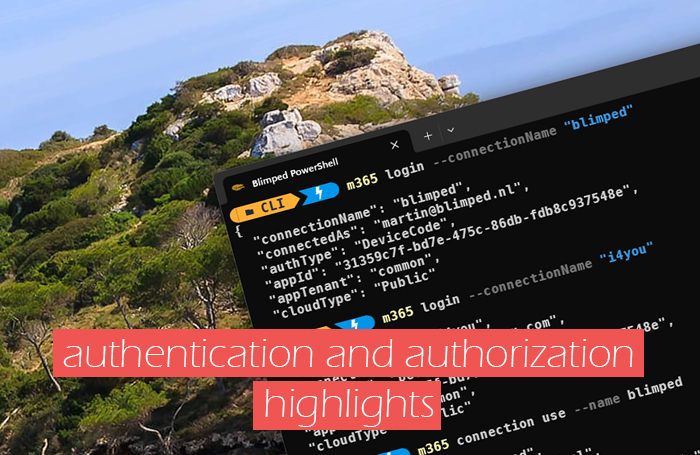
m365 login --connectionName blimped
For easy reference, I’m giving the connection a name. This is not required, you can always update them afterwards using the ‘m365 connection set’ command
Note:
The '--connectionName' option is not required. It's only used to give a name for easy reference. By default, the name will be the object ID of my signed in identity. Altering the name can be easily done, using 'm365 connection set'.
Step 2: sign in to another tenant
…and give the connection an easy name as well
m365 login --connectionName contoso
Step 3: list my connections
If I now run m365 connection list, I’ll be able to view a list of my connections and which one is active:
[
  {
    "name": "blimped",
    "connectedAs": "martin@blimped.nl",
    "authType": "DeviceCode",
    "active": false
  },
  {
    "name": "contoso",
    "connectedAs": "martin@contoso.com",
    "authType": "DeviceCode",
    "active": true
  }
]
Step 4: switching between connections
Using the m365 connection use command, I can easily switch between my connections and start working with the other tenant:
m365 connection use --name blimped

# Executing any command now will be done in the context of the 'blimped' tenant
m365 spo site list --filter "Url -like https://blimped.sharepoint.com/sites/PRJ"
⭐ Working with the CLI for Microsoft 365 just got a whole lot easier for me. I can now easily switch between my tenants and execute commands in the context of the tenant I’m working with. ⭐
🛡️ Privileged Identity Management (PIM) support
A lot of my customers use PIM these days: Privileged Identity Management. It is a great feature in Entra ID to give people administrative access only when they really need it: “Just in time” RBAC, so to speak. Administrative roles are super important in an organization, but there’s always the danger of people forgetting they’re logged in with an account brandishing god-mode! We’re only human after all. Requesting activation of a role when (and only when) we need it, is an obvious step to lessen the potential for human errors and also the potential for security issues.
When working from the terminal we often need to manage our tenants, and sometimes we need to do this with administrative roles. The CLI for Microsoft 365 has a great feature that allows you to request activation of administrative roles from the terminal. And this is how it works:
Using the following one liner I can request activation of my own SharePoint Administrator role:
m365 entra pim role assignment add --roleDefinitionName 'SharePoint Administrator'
By default this will request activation for 8 hours. If you need more time, you can specify so using the --duration or --endDateTime parameters.
It’s also possible to add a reason why you are requesting permissions, and other information such as a ticket number:
m365 entra pim role assignment add --roleDefinitionName 'SharePoint Administrator' --justification "I need to delete them SharePoint sites!" --ticketNumber "INC12345"
We can specify the role definition by name or by its Id. And it’s not just possible to activate your own roles. You can also request activation of roles for other users, in which case you would need to have the Priviliged Administrator role yourself.
In the current setup, It’s only possible to request role activation through PIM for Roles. But in the future it will also be possible to request activation of roles through PIM for Groups.
Conclusion
I personally really like these CLI for Microsoft 365 features in the identity space. They make my life a whole lot easier as I can now stay in the terminal, quickly switch back and forth between accounts, request roles whenever I need it and not mind about going to the Azure portal to click through 10 screens to get what I need!
Happy coding!
Sources
- CLI for Microsoft 365 - Switching connections
- CLI for Microsoft 365 - Listing connections
- CLI for Microsoft 365 - Updating connections
- CLI for Microsoft 365 - Removing connections
- CLI for Microsoft 365 - Request activation of roles through PIM
cli-microsoft365 entraid security
More
More blogs

Resource Specific Consent - Using delegated Sites.Selected
Sites.Selected has been made available in delegated mode! What does it mean and how does it work?
Read more
Running .NET Function Apps or App Services accessing Microsoft 365
A guide on how to create a .NET application that can access SharePoint and the Microsoft Graph through Entra ID.
Read more
Running applications with limited SharePoint permissions
Securing application access to SharePoint through Entra ID is easy, but how to access SharePoint using the principle of least privilege?
Read moreThanks
Thanks for reading

Thanks for reading my blog, I hope you got what you came for. Blogs of others have been super important during my work. This site is me returning the favor. If you read anything you do not understand because I failed to clarify it enough, please drop me a post using my socials.
Warm regards,
Martin
Microsoft MVP | Microsoft 365 Architect