There are two main reasons I really like Continuous Deployment/Integration (CI/CD) pipelines: a) I dislike repetition and b) I like releases to be predictable! And releasing an update for an SPFx app is a boring job to do twice or more, isn’t it? There are multiple systems that have CI/CD pipelines. I’m personally familiar with both GitHub and Azure DevOps. This post is about using pipelines in Azure DevOps.
Table of Contents
- Part 1: Deploying SPFx apps with Azure DevOps pipelines - Classic variant
- Part 2: Deploying SPFx apps with Azure DevOps pipelines - all YAML variant (This blog)
Scenario
So the other day I published a blog post on how to deploy using classic release pipelines. This is how I’ve always worked. But there is a newer kid in town, going all YAML. Which I didn’t really have any experience with. Inspired by a friend from the CLI team (😍 sharing is caring, you rock Adam!), I dove into it.
Note:
This post contains quite some duplicated text, but to follow along without reading the other post seemed to me the best.
So here goes an new blog post demonstrating how to create a single Pipeline in Azure DevOps that can build and deploy a SharePoint Framework application, using multiple stages and deployments to multiple environments, with approval in between!
The following picture globally describes how the process works. I’m using a build and two deployment stages in this example, but it’s perfectly useful as well if you just deploy to one environment or even to a full-blown DTAP street.
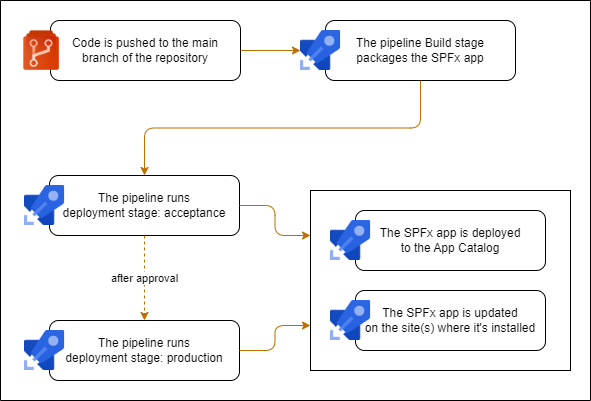
We’ll use the CLI for Microsoft 365 to deploy the app. To connect to SharePoint, we’ll use an Entra ID application registration with a certificate. For simplicity’s sake I’ll just upgrade the app on a single SharePoint site, but it’s also possible to deploy to multiple sites.
To follow along, you’ll need some experience with Azure DevOps pipelines. But if you’ve got questions, do respond below with a comment or reach out through the socials.
The solution
Okay, so I’ve got a repository with an SPFx app that I’ve tested locally. To deploy all this we need to go through a couple of steps.
Step 1: Setting up authentication
The first step is to arrange some things for authentication. When we release an SPFx app to SharePoint, we’ll need to authenticate to SharePoint to do so. We’ll use an Entra ID Application Registration and authenticate using the client credentials grant flow with a certificate. The Application will use app-only permissions on SharePoint to deploy the package. In my scenario I’m using separate Acceptance and Production environments, (Entra ID and SharePoint, everything is separate) so I’ll need two Application Registrations. One in each Entra ID Tenant.
You can do this in a lot of ways. My favorite is using scripting, so the following PowerShell code will generate a self-signed certificate for me. It will also create an Application Registration using the CLI for Microsoft 365. (You’ll need to have the proper security role for this) However: feel free to do this using the Entra ID portal. The Application Registration will have Sites.FullControl.All app-only permissions on SharePoint. This is kind of heavy, you could also use Sites.Selected and assign permissions to the App Catalog and the sites where the SPFx app should be installed. For this example I’ll keep it simple though.
# Generate a self-signed certificate and save the pfx- and cer-files
$password = ConvertTo-SecureString -String "some-safe-password" -Force -AsPlainText
$cert = New-SelfSignedCertificate -NotBefore $(Get-Date).AddDays(-1) -NotAfter $(Get-Date).AddYears(1) -FriendlyName "CI-CD-Certificate" -CertStoreLocation cert:\CurrentUser\My -Subject "CN=CICDCertificate" -KeyAlgorithm RSA -KeyLength 2048 -KeyExportPolicy Exportable
$cert | Export-Certificate -Type cer -FilePath "$PWD/CI-CD-Certificate.cer" -Force
$cert | Export-PfxCertificate -FilePath "$PWD/CI-CD-Certificate.pfx" -Password $password
$cert | Remove-Item

# Create the application registration, upload the certificate and grant it admin consent
m365 entra app add --name 'My CI/CD Application' --apisApplication 'https://microsoft.sharepoint-df.com/Sites.FullControl.All' --certificateFile ./CI-CD-Certificate.cer --certificateDisplayName 'CICD Certificate' --grantAdminConsent
📝 Be sure to write down the appId, tenantId and certificate password that you get from these steps. We’ll need these later on.
In my case I’ll run this code twice, once for each Entra ID tenant I’m signing into.
Step 2: Adding variables and certificate to the DevOps Library
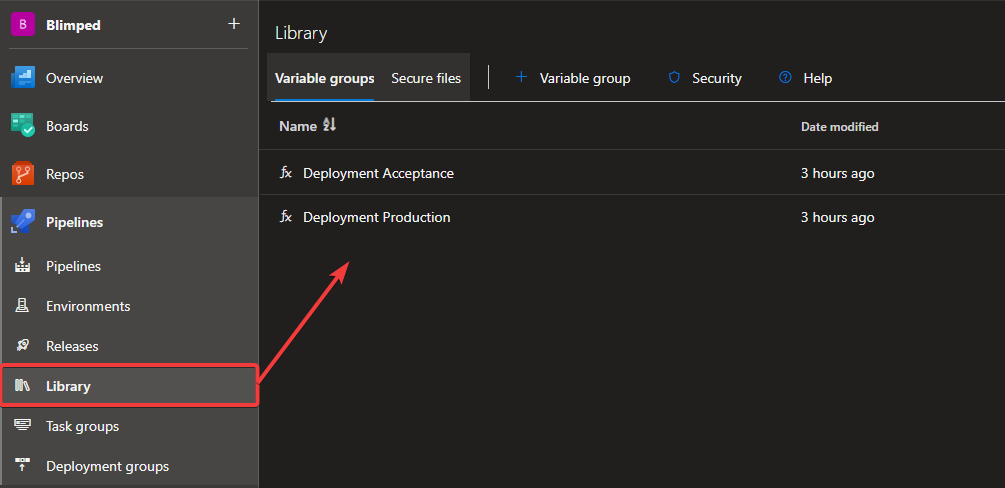
To be able to use the certificate and all the GUID’s and passwords we’ve just memorized, we’ll need to add them to Azure DevOps. We’ll navigate to our Azure DevOps project and go to Pipelines > Library. Here we’ll be able to add variables and upload the PFX-files of our certificates, so that they can be used in the Pipeline.
I generally add a variable group for each stage that I’ll create, in my case Acceptance and Production:
In these variable groups, I’ll create a couple of variables. Both groups will have the same variables, but with different values. The variables are:
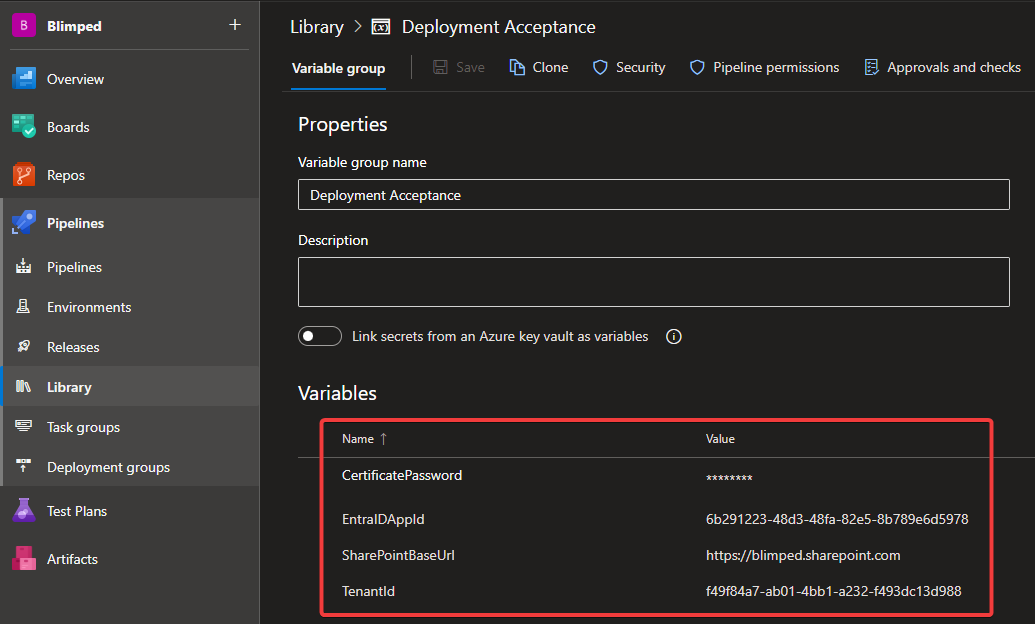
The variables should speak for themselves, they contain values we’ve written down earlier and that I feel should not be in the actual YAML-definition. But if you like you can add some of them to YAML as well.
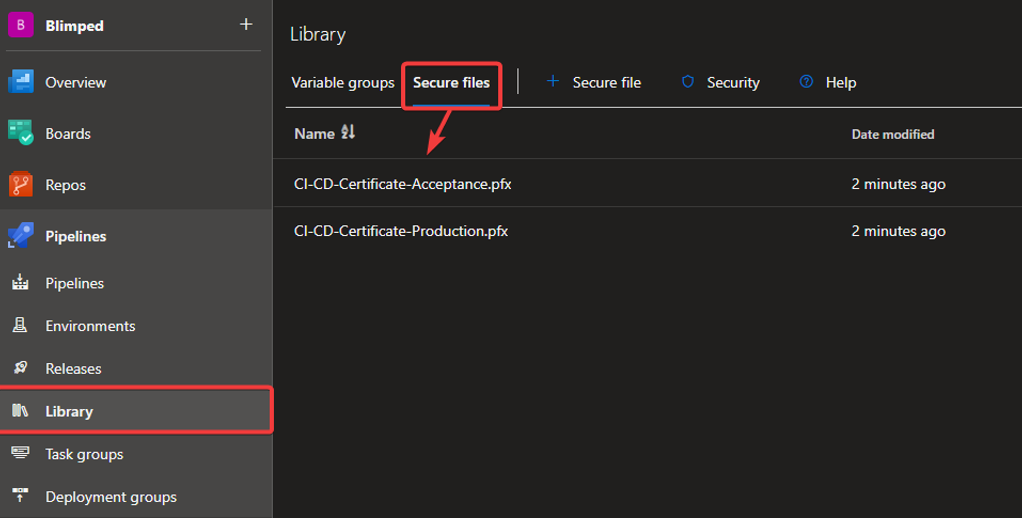
There’s also a secure files section. Here we’ll upload the certificates we’ve created earlier.
Step 3: Configuring the environments in DevOps
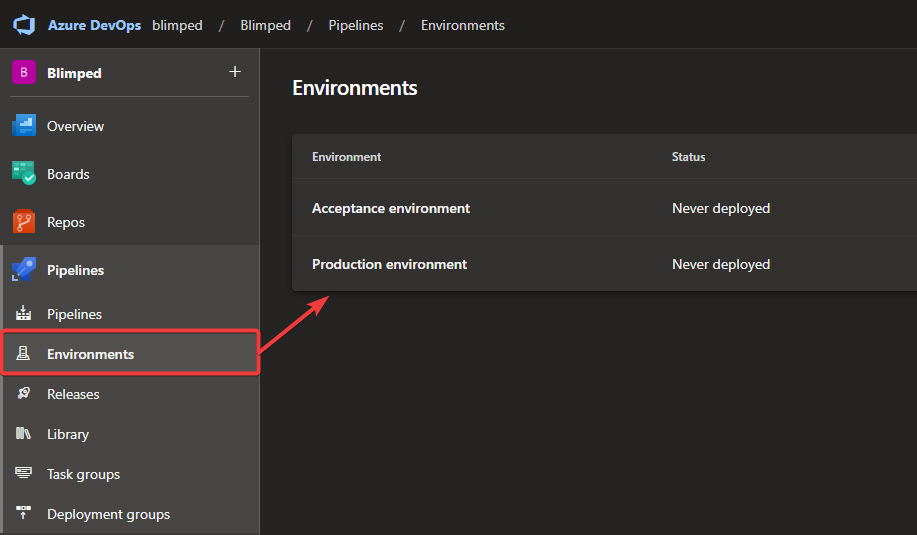
While we’re still in the DevOps portal, we can take the time to create the environments that the Pipeline will use on the Pipelines > Environments page in the DevOps portal. I’ll create two environments, one for acceptance and one for production:
Environments are just wrappers or containers that the pipeline will access. We’ll be able to view deployment logs through them. And if you’re looking for approval-functionality: that cannot be added to the YAML build definition… (!!) You can only configure it on the environment. We want to be able to deploy to Acceptance and Production separately. So I’ll need to add approval functionality to the pipeline to be able to pause the pipeline and approve releases before going to production.
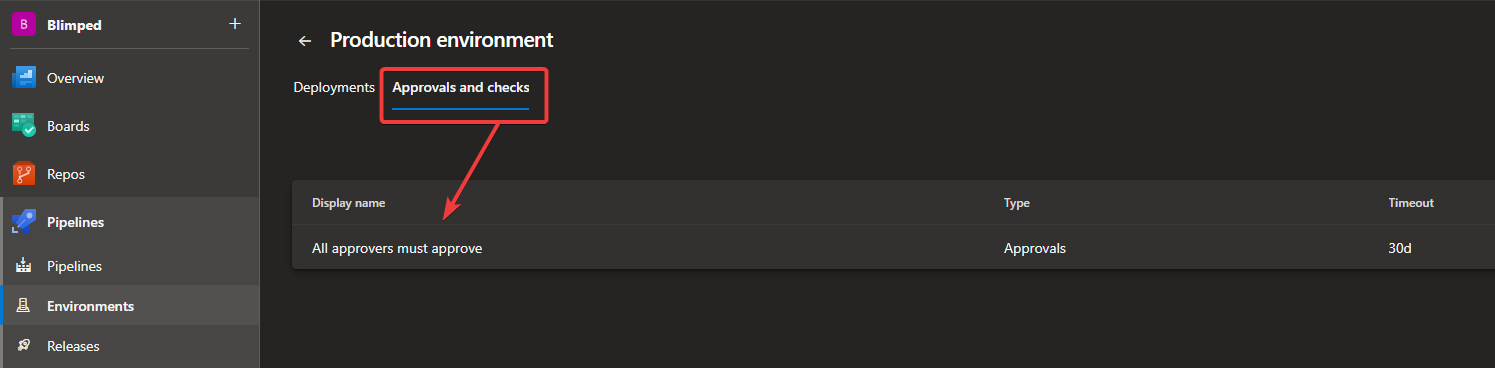
On the details page of the production environment we can do that by selecting ‘Approvals and checks’ and configure the approval:
After setting this up, we’re finally ready to create the Build & Release Pipeline!
Step 4: Creating the pipeline definition
To create the Pipeline, I first include the following yaml-code in an azure-pipelines.yml file in the repository of my SPFx application. This code is a pipeline definition, written in yaml. As you can see it contains multiple stages and multiple tasks to bundle and package and deploy the app.
As you can see it’s quite a significantly big file. That’s partly because I included the full Acceptance and Production release stages, which are actually largely the same. This can be simplified by using Templates, but that’s for another day (and another post). I’ve included some comments to make it clear what the different sections mean:
# The Pipeline will start when code is pushed or merged to the main branch
trigger:
  branches:
    include:
    - main

# The Pipeline will run on an ubuntu machine/agent
pool:
  vmImage: 'ubuntu-latest'

# Some central variables that we need, in this case the Product ID of the SPFx app
# you can find it in the package-solution.json file.
variables:
- name: SPFxAppId
  value: '4ac53ecc-76ec-455b-82c0-f627bb371dc2'

stages:

# The build stage takes care of bundling and packaging the SPFx application. It will publish the SPPKG as an artifact.
- stage: Build
  jobs:
  - job: 'Build'
    steps:
    - task: NodeTool@0
      displayName: 'Use Node 16.x'
      inputs:
        versionSpec: '16.x'

    - task: Npm@1
      displayName: 'Npm install packages'
      inputs:
        command: 'install'

    - task: Gulp@0
      displayName: 'Execute bundle gulp task'
      inputs:
        gulpFile: ./gulpfile.js
        targets: bundle
        arguments: '--ship'

    - task: Gulp@0
      displayName: 'Execute package-solution gulp task'
      inputs:
        targets: 'package-solution'
        arguments: '--ship'

    - task: CopyFiles@2
      displayName: 'Copy sppkg-file to artifact staging directory'
      inputs:
        Contents: |
          sharepoint/**/*.sppkg
        TargetFolder: '$(Build.ArtifactStagingDirectory)'
        flattenFolders: true

    - task: PublishBuildArtifacts@1
      displayName: 'Publish staged artifacts'
      inputs:
        artifactName: 'drop'

# The 'Release to Acceptance stage deploys The SPPKG to the Acceptance Environment
# It will only do so if the Build-stage has completed successfully.
- stage: 'ReleaseToAcceptance'
  displayName: 'Release to Acceptance'
  condition: succeeded('Build')

  # It will include all variables from the correct Variable Group
  variables:
  - group: 'Deployment Acceptance'

  jobs:
  - deployment: 'ReleaseToAcceptance'
    displayName: 'Release to Acceptance'

    # It will publish the releases to the environment that you can go to in the DevOps portal
    environment: 'Acceptance environment'

    # We're using a standard, simple runOnce deployment strategy
    strategy:
      runOnce:
        deploy:
          steps:

          # Download the certificate to the agent
          - task: DownloadSecureFile@1
            name: caCertificate
            displayName: 'Download secure file'
            inputs:
              secureFile: 'CI-CD-Certificate-Acceptance.pfx'

          # Configure the Node.JS version we want to use
          - task: NodeTool@0
            displayName: 'Use Node 16.x'
            inputs:
              versionSpec: 16.x

          # Install the CLI for Microsoft 365
          - task: Npm@1
            displayName: 'Install CLI for Microsoft 365'
            inputs:
              command: custom
              verbose: false
              customCommand: 'install -g @pnp/cli-microsoft365'

          # Execute a CLI script to deploy the app to SharePoint
          - script: |
              m365 login --authType certificate --certificateFile "$(caCertificate.secureFilePath)" --password "$(CertificatePassword)" --appId "$(EntraIDAppId)" --tenant "$(TenantId)"
              m365 spo set --url "$(SharePointBaseUrl)"
              m365 spo app add --filePath "$(Pipeline.Workspace)/drop/my-spfx-application.sppkg" --overwrite
              m365 spo app deploy --id "$(SPFxAppId)"
              m365 spo app upgrade --id "$(SPFxAppId)" --siteUrl "$(SharePointBaseUrl)/sites/Sales"
            displayName: 'Add, deploy and upgrade app'

# The 'Release to Production' stage deploys The SPPKG to the Production Environment
# This follows the same steps as acceptance, but connects the correct variable group and environment.
- stage: 'ReleaseToProduction'
  displayName: 'Release to Production'
  condition: succeeded('ReleaseToAcceptance')

  variables:
  - group: 'Deployment Prod'

  jobs:
  - deployment: 'ReleaseToProduction'
    displayName: 'Release to Production'
    environment: 'Production environment'

    strategy:
      runOnce:
        deploy:
          steps:

          - task: DownloadSecureFile@1
            name: caCertificate
            displayName: 'Download secure file'
            inputs:
              secureFile: 'CI-CD-Certificate-Production.pfx'

          - task: NodeTool@0
            displayName: 'Use Node 16.x'
            inputs:
              versionSpec: 16.x

          - task: Npm@1
            displayName: 'Install CLI for Microsoft 365'
            inputs:
              command: custom
              verbose: false
              customCommand: 'install -g @pnp/cli-microsoft365'

          - script: |
              m365 login --authType certificate --certificateFile "$(caCertificate.secureFilePath)" --password "$(CertificatePassword)" --appId "$(EntraIDAppId)" --tenant "$(TenantId)"
              m365 spo set --url "$(SharePointBaseUrl)"
              m365 spo app add --filePath "$(Pipeline.Workspace)/drop/my-spfx-application.sppkg" --overwrite
              m365 spo app deploy --id "$(SPFxAppId)"
              m365 spo app upgrade --id "$(SPFxAppId)" --siteUrl "$(SharePointBaseUrl)/sites/Sales"
            displayName: 'Add, deploy and upgrade app'
As I said, it’s quite a big file. The important part is the CLI for Microsoft 365 script that’s used to deploy the app. That’s actually quite short. Let’s go through it again:
m365 login --authType certificate --certificateFile "$(certificateFile.secureFilePath)" --password "$(CertificatePassword)" --appId "$(EntraIDAppId)" --tenant "$(TenantId)"
m365 spo set --url "$(SharePointBaseUrl)"
m365 spo app add --filePath "../drop/my-spfx-application.sppkg" --overwrite
m365 spo app deploy --id "$(SPFxAppId)"
m365 spo app upgrade --id "$(SPFxAppId)" --siteUrl "$(SharePointBaseUrl)/sites/Sales"
So what does this do?
- This script will sign in using our Entra ID app and certificate that has been downloaded to the agent.
- It’s using the
m365 spo setcommand to configure the SharePoint root-URL. If I wouldn’t use it, the CLI for Microsoft 365 would try to discover what my tenant is, and I’d need to grant extra permissions for it to be able to do so. - It will upload the app to the app catalog. The path to the SPPKG is the path to where the artifacts have been downloaded by the agent. This is an automated task, and it does not download the files to the Artifacts Staging Directory, like I would have expected. It’s one level back up in the ‘Pipeline.Workspace’ or ‘Agent.BuildDirectory’. If you don’t know for sure, you can trigger a release and check the logs to see where the artifacts are downloaded to. If you can’t find the downloaded files, you can also use the
DownloadBuildArtifacts@1task to download the files explicitly to a location of your choosing. - It will deploy the app. The GUID that’s used here in the
SPFxAppIdvariable is the Product ID of the SPFx app. You can find this in thepackage-solution.jsonfile in thesharepointfolder of your SPFx app. - It will upgrade the app on the site where it’s installed.
It will use all the correct variables, coming from the variable and variable group that are part of the definition and the DevOps library and the certificateFile output variable from the Download secure file task.
Step 5: Creating the pipeline in the DevOps Portal
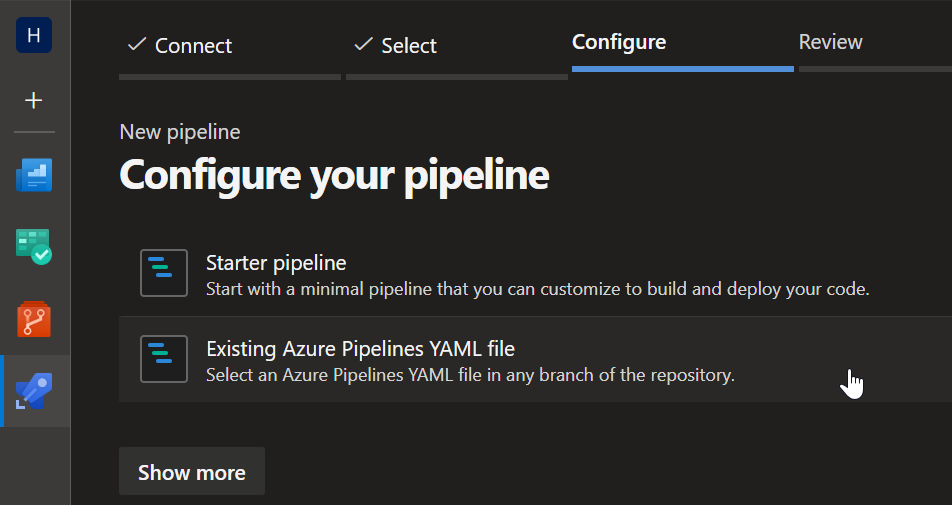
After committing and pushing the definition file to the repository, I’ll need to create the pipeline based on the pipeline definition. I can do this by going to the Pipelines > Pipelines section in my Azure DevOps project and clicking the “New Pipeline” button. I’ll select the repository and the main branch and click “Continue”. I’ll select the “Existing Azure Pipelines YAML file” option and select the azure-pipelines.yml file. I’ll click “Continue” and “Run” to start the build pipeline and run it for the first time.
This will successfully create the pipeline and run it the first time. During the run it will ask you to give the Pipeline permission to the certificates you are downloading, and to the environments you are publishing to.
This will look more or less as follows:
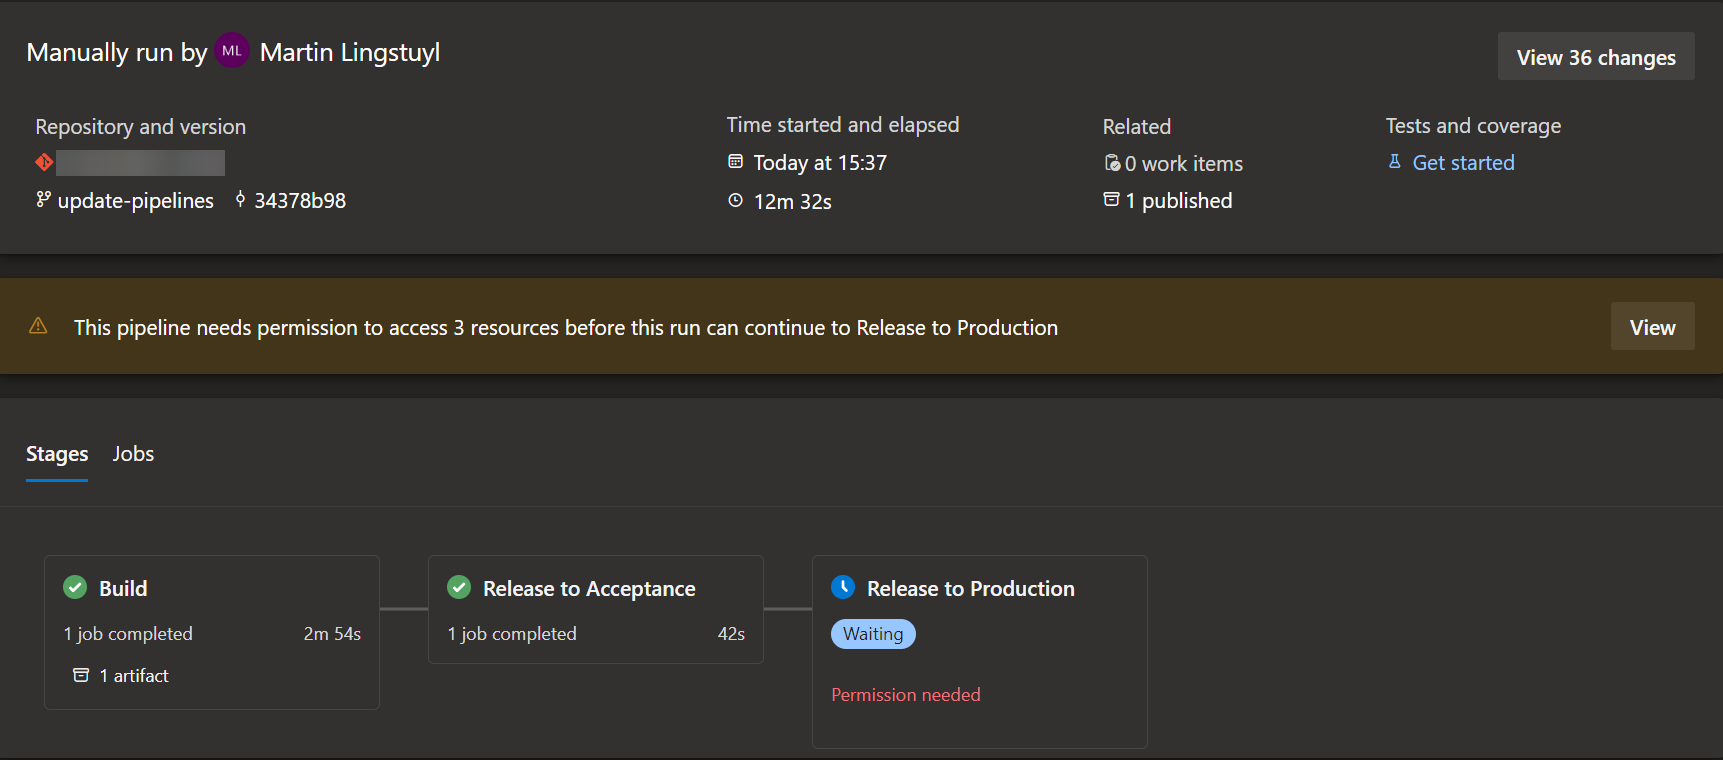
On the Pipeline overview page you’ll also see the status of the latest runs:

Conclusion
If we’ve configured all of this correctly, the pipeline will automatically deploy the app after a succesful build is run. Any extra stages will be deployed after approving to do so. Isn’t that fantastic? No more taking threehundred steps to deploy a typo in your code. Just push your code to the repository and go for it!
I hope you’ve learned something from this blog post! Let me know if you have any questions!
Happy coding!
Sources
- Microsoft Docs - Azure DevOps Pipelines key concepts
- Microsoft Docs - Azure DevOps Pipelines - Stages
- Microsoft Docs - Azure DevOps Pipelines - Deployments
- Microsoft Docs - The Client Credentials Grant Flow
- CLI for Microsoft 365 - Logging into your tenant
- CLI for Microsoft 365 - Setting the URL of the root SharePoint site collection for use in SPO commands
- CLI for Microsoft 365 - Adding an app to an app catalog
- CLI for Microsoft 365 - Deploying an app in an app catalog
- CLI for Microsoft 365 - Upgrading an app in a specified site
spfx cicd cli-microsoft365 azuredevops
More
More blogs
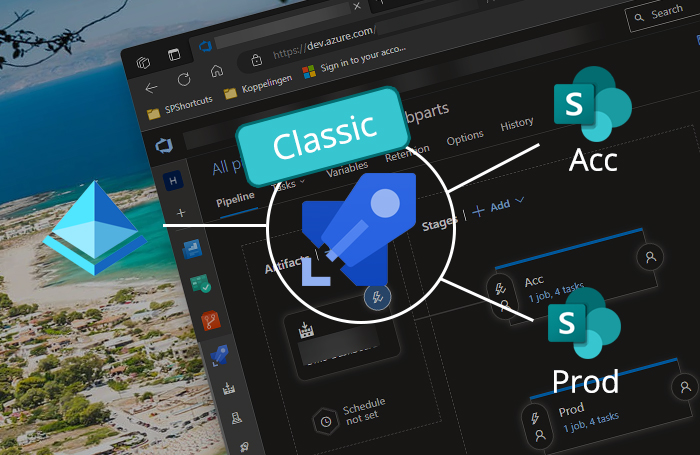
Deploying SPFx apps with Azure DevOps pipelines - Classic variant
In this blog post I will show you how you can deploy SPFx apps using Azure DevOps pipelines with a classic release pipeline.
Read more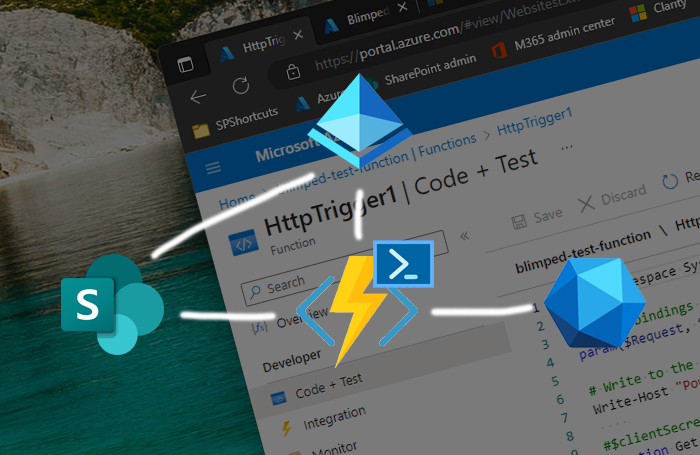
Using the on-behalf-of flow in Azure PowerShell Functions
A step by step guide on how to use the on-behalf-of flow in Azure PowerShell Functions.
Read more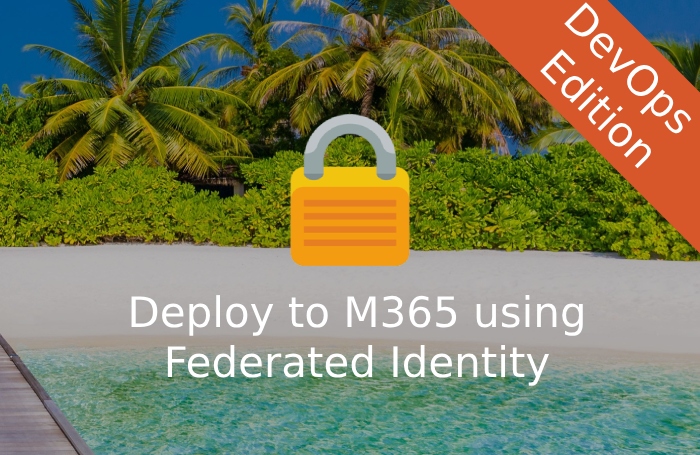
Deploying to Microsoft 365 using the CLI and federated identity - DevOps edition
Learn how to properly deploy artifacts from Azure DevOps Pipelines to Microsoft 365 using the CLI for Microsoft 365 without fiddling with certificates or user credentials.
Read moreThanks
Thanks for reading

Thanks for reading my blog, I hope you got what you came for. Blogs of others have been super important during my work. This site is me returning the favor. If you read anything you do not understand because I failed to clarify it enough, please drop me a post using my socials.
Warm regards,
Martin
Microsoft MVP | Microsoft 365 Architect