How to copy list & library views in SharePoint? That’s what this post is about. There’s currently no way to do this in the SharePoint User Interface. However, it’s easy to think of use cases for it. I’ve created a SharePoint framework sample demonstrating how it can be done.
Table of Contents
Scenario
If a user wants to change a list or library view a bit, he can of course do so using the UI. But many users are active on multiple sites with multiple similar lists and libraries. When changing lists views in such a scenario, users either need to do a lot of repetitive manual steps, or they’d need to request the services of IT, or they might need something of a provisioning solution.
💪 I’m of the opinion: Give the power back to the users! 💪
So the idea is to allow users to copy views that exist in a list or library towards other lists or libraries.
It should copy all relevant portions of a view:
- Which columns are visible
- Sorting
- Group by
- View formatting
- Filtering
But when a column is missing in the target list, that part of the view should not copied.
Sample
The sample I’ve created is an SharePoint Framework (SPFx) clientside solution. You can find it on GitHub. It can either be used as a webpart or as an extension to list & library command bars or context menu’s.
The sample uses React, Fluent UI (Office UI Fabric React) for the UI components and PnPjs for communicating with SharePoint.
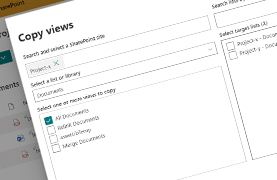
And this is what it looks like:
User Interface
As you can see there’s a lot of User Interface there. It’s all just the default Controls that can be added with the preinstalled Fluent UI Framework: <CheckBox />, <ComboBox />, <SearchBox />, <Stack />, <MessageBar />, <Link /> and <ProgressIndicator />, things like that.
Site Picker
The one thing I’d like to highlight here is what I’ve used to pick the source site. I needed a flexible dropdown component with something like auto complete functionality and a slightly custom UI:
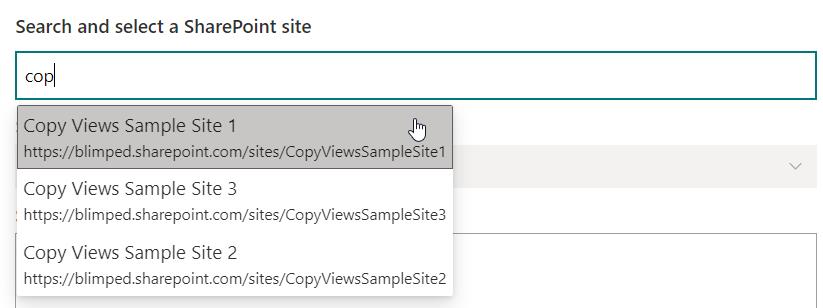

I eventually chose the Fluent UI Custom Picker for this as I didn’t want an extra dependency.
It can be configured as follows:
// Step 1: Import the correct interfaces and classes
import { BasePicker, IBasePickerProps, IPickerItemProps } from 'office-ui-fabric-react/lib/Pickers';

// Step 2: Define a custom props interface with a chosen shape (ISite)
interface ISitePickerProps extends IBasePickerProps<ISite> {}

// Step 3: Define a custom class that extends from the BasePicker
class SitePicker extends BasePicker<ISite, ISitePickerProps> {}

// Step 4: Render the picker
<SitePicker
    onResolveSuggestions={this._getSitePickerOptions}
    onRenderSuggestionsItem={this._renderSuggestion}
    onRenderItem={this._renderItem}
    onChange={this._onSiteSelected}
    selectedItems={selectedSourceSite ? [selectedSourceSite] : []}
    itemLimit={1}
    resolveDelay={500} />
The onResolveSuggestions delegate can be used to query SharePoint and return sites in the chosen shape (that I named ISite). The onRenderItem delegate can be used to return a set of JSX elements, thereby shaping the UI of the selected item. The onRenderSuggestionsItem delegate is used to render the items in the dropdown. The rest is straightforward.
Copying the views
A lot more can be said of building UI’s. But let’s get down to the actual thing that needs to be done: Copying views. This is a little more complex, but luckily we’ve got a great community built tool to help us with it: PnPjs.
A bit of context. In this sample I’m copying views one at a time: 1 view from 1 list to 1 list. But we do that in parallel using await Promise.all to make it faster.
Let’s break the entire thing down into a few steps:
Step 1: Gather the required information
The first thing we need to do is gather some information. We need:
- Of the source view: the view properties and the view fields
- Of the target list: the view (if already available) and the available list fields. We want this because we want to check if view fields are available on the target list before copying a view.
As we do not want to make too many calls to SharePoint, we’ll need to be as optimal as possible, using expands where possible to call as much and as specifically as possibly. This is what I made of it:
const sourceWeb = Web([this._sp.web, sourceView.siteUrl]);
const sourceList = sourceWeb.lists.getById(sourceView.listId);
const sourceViewInfo = await sourceList.getView(sourceView.id)(); // Gets the source view properties
const sourceViewFields = await sourceList.getView(sourceView.id).fields(); // Gets the source view fields

const targetWeb = Web([this._sp.web, targetSiteUrl]);
const targetList = targetWeb.lists.getById(targetListId);
const targetListInfo = await targetList.expand("Views", "Fields").select("Views/Id", "Views/ServerRelativeUrl", "Fields/InternalName")(); // Get all the target list info we need in one call.

// Gets an existing target view based on filename
const targetView = targetListInfo.Views.filter(view => {
    const viewFileName = view.ServerRelativeUrl.substring(view.ServerRelativeUrl.lastIndexOf('/') + 1);
    return viewFileName === sourceView.fileName;
})[0];
Step 2: Create a view properties object
The second step is to build a View object with the right properties that we can hand to PnPjs to do its work.
const properties = {
    CustomFormatter: sourceView.CustomFormatter,
    RowLimit: sourceView.RowLimit,
    Hidden: sourceView.Hidden,
    IncludeRootFolder: sourceView.IncludeRootFolder,
    JSLink: sourceView.JSLink,
    Paged: sourceView.Paged,
    Scope: sourceView.Scope,
    TabularView: sourceView.TabularView,
    Title: sourceView.Title,
    ViewQuery: this._buildViewQuery(sourceView, targetList),
    ViewType2: sourceView.ViewType2
} as IViewInfo;

if (setAsDefaultView) {
    properties.DefaultView = true;
}
Of these properties a lot have been around for a long time. The more modern ones are CustomFormatter and ViewType2. The last one is quite interesting, as it sets specific types of modern views. It can hold one of the following values: "KANBAN" | "TILES" | "COMPACTLIST" | "MODERNCALENDAR" | null.
Almost all of these properties can just be filled one on one by the value of the source view property.
Step 3: Modify the ViewQuery
The one property that’s more complex is the ViewQuery-property, this one contains a CAML-query, which is an XML-structure that describes the way the View is sorted, grouped and/or filtered. CAML is quite old already, but it’s still important to understand how it works for our use case. For example: it might contain a filter condition with a field that is not available on the target list. So we need to parse the ViewQuery and remove references to fields that are not available.
A CAML ViewQuery might look like this:
<GroupBy Collapse="TRUE" GroupLimit="30">
    <FieldRef Name="SomeColumnThatOnlyExistsOnSourceList" />
</GroupBy>
<OrderBy>
    <FieldRef Name="FileLeafRef" />
</OrderBy>
<Where>
    <And>
        <Neq>
            <FieldRef Name="SomeColumnThatOnlyExistsOnSourceList" />
            <Value Type="Text">SomeValue</Value>
        </Neq>
        <Neq>
            <FieldRef Name="SomeOtherColumn" />
            <Value Type="Text">SomeOtherValue</Value>
        </Neq>
    </And>
</Where>
I would have liked if CAML would come as JSON. But no, it’s XML, which is harder to work with in JavaScript. But luckily we have a tool at our disposal that’s been in the browser for a long time as well: the DOMParser.
Note:
The DOMParser interface provides the ability to parse XML or HTML source code from a string into a DOM Document.
If you’ve worked with the Web stack for years, working with the DOM is easy. So using the DOMParser is quite easy as well. So how do we do that? Parsing the CAML-query can be done as follows:
const domParser = new DOMParser();
const sourceViewDoc = domParser.parseFromString("<Root>" + sourceView.ViewQuery + "</Root>", "text/xml");
That’s it, we now have the ViewQuery in memory as a DOM object tree. I’ve added the <Root></Root> elements because XML requires a root element where the CAML here does not have it. We can easily remove it again when converting the DOM object tree back to an XML string.
With this DOM object tree we can do a lot of things. Like iterating through it and removing references to fields that are not in the target list:
const elementsToRemove: Element[] = [];
const fieldRefs = sourceViewDoc.getElementsByTagName("FieldRef");

for (let i = 0; i < fieldRefs.length; i++) {
    if (targetList.Fields.every(field => field.InternalName !== fieldRefs[i].getAttribute("Name"))) {
        elementsToRemove.push(fieldRefs[i]);

        if (fieldRefs[i].nextElementSibling && fieldRefs[i].nextElementSibling.nodeName === "Value") {
            elementsToRemove.push(fieldRefs[i].nextElementSibling);
        }
    }
}
The code above will return the following two elements that are to be removed:
<FieldRef Name="SomeColumnThatOnlyExistsOnSourceList" />
<Value Type="Text">SomeValue</Value>
We can now delete those elements from the DOM object tree:
for (let i = 0; i < elementsToRemove.length; i++) {
    const element = elementsToRemove[i];
    const parentElement = element.parentElement;
    parentElement.removeChild(element);

    if (!parentElement.hasChildNodes()) {
        this._recursiveDeleteElement(parentElement);
    }
}
What we’re doing here is removing the element itself, but also removing any parent elements that are left empty, for example the remaining <Neq></Neq> element in the example CAML above.
As a last step we must fix any <And> and <Or> conditions. These elements are supposed to have two children. If one is removed, the <And> elements should be replaced by it’s single remaining child. Essentially, what’s done is the following:
Before:
<And>
    <Neq>
        <FieldRef Name="SomeColumnThatOnlyExistsOnSourceList" />
        <Value Type="Text">SomeValue</Value>
    </Neq>
    <Neq>
        <FieldRef Name="SomeOtherColumn" />
        <Value Type="Text">SomeOtherValue</Value>
    </Neq>
</And>
After removing the non-existent column:
<And>
    <Neq>
        <FieldRef Name="SomeOtherColumn" />
        <Value Type="Text">SomeOtherValue</Value>
    </Neq>
</And>
Removing the ‘And’ condition element:
<Neq>
    <FieldRef Name="SomeOtherColumn" />
    <Value Type="Text">SomeOtherValue</Value>
</Neq>
The ViewQuery is now ready to be added to the View Properties object, so we retrieve the XML-string from the DOM tree object:
return sourceViewDoc.firstElementChild.innerHTML
In this line firstElementChild is the <Root> element that we inserted when parsing the CAML. innerHTML is the easy way with which to get the stringified version of any DOM tree object in the browser.
Step 4: Create/Update the View
Once we have the View properties object with the correct ViewQuery, the rest is quite simple. We use PnPjs to either add() or update() the view with its properties:
// Add the view
const viewAddResult = await targetList.views.add(sourceView.title, false, properties);

// Or Update the existing view
const viewUpdateResult = await targetList.views.getById(targetView.Id).update(properties);
Step 5: Update the View Fields
And last but not least, we need to set the view fields and their order. This unfortunately cannot be done in the same call with the create/update action as we need to use different API endpoints for that. The code is as follows:
// We first create a list of viewFields
const viewFields: string[] = [];
sourceViewFields.Items.forEach(item => {
    if (targetList.Fields.some(field => field.InternalName === item)) {
        viewFields.push(item);
    }
});

// We clear the target fields and add the new fields, one at a time.
if (viewFields.length > 0) {
    await targetView.fields.removeAll();

    for (let i = 0; i < viewFields.length; i++) {
        await targetView.fields.add(viewFields[i]);
    }
}
In conclusion
Wrapping this all up we can say that copying a view is not a simple task at all. A lot needs to be factored in. I hope this sample will get you started in a good way. It’s not perfect yet. For example it does not support Kanban board views and modern calendar views. As these view types depend on an extra field that you would need to verify or create in the target list. If you want you can contribute to my sample and add it though. In the true spirit of the PnP community, isn’t it?
Happy coding all!
Watch my session online
You can also watch my presentation on the Microsoft 365 Viva & SharePoint Framework Community Call of 20th of October. Check out the post or the video below. My presentation is around 16:26.
Sources
- Microsoft Viva and SPFx Community Call – 20th of October, 2022
- GitHub - react-copy-views sample
- PnPjs - Views
- The DOMParser API
spfx pnpjs sharepoint
More
More blogs
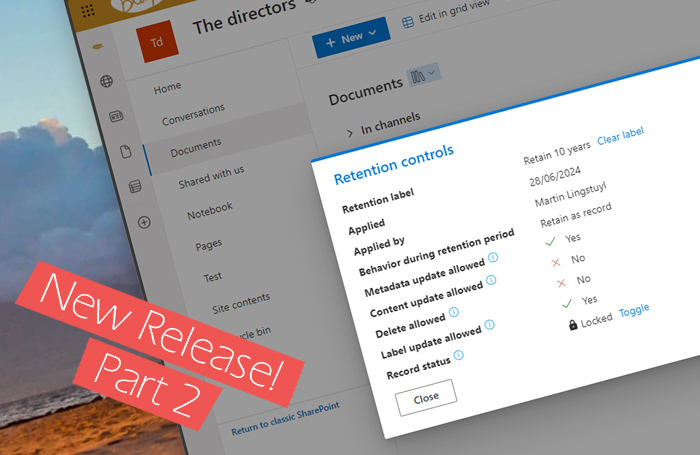
Extending Microsoft 365 with custom retention controls - Part 2
New release of a small Microsoft 365 extension I've developed to view & manage retention controls.
Read more
SPFx and the potential pitfall of partial page navigation
How you need to take partial page navigation into account when building SPFx customizations.
Read more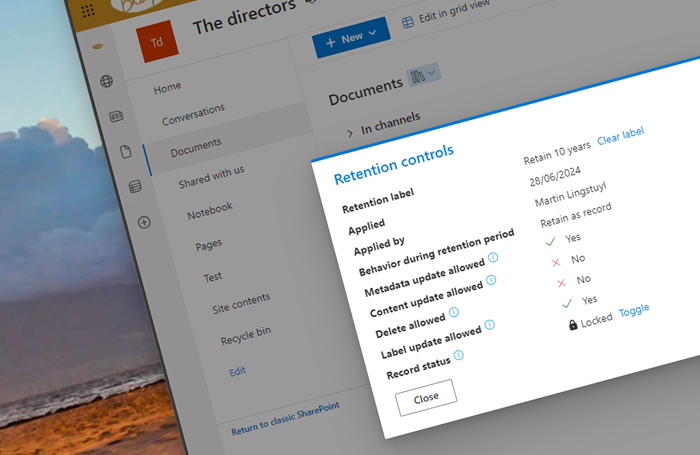
Extending Microsoft 365 with custom retention controls
Thinking about a Purview post by Joanne C Klein, I've developed a small Microsoft 365 extension to view & manage retention controls.
Read moreThanks
Thanks for reading

Thanks for reading my blog, I hope you got what you came for. Blogs of others have been super important during my work. This site is me returning the favor. If you read anything you do not understand because I failed to clarify it enough, please drop me a post using my socials.
Warm regards,
Martin
Microsoft MVP | Microsoft 365 Architect