
You might have missed it, but you will certainly run into it when using PnP PowerShell or the CLI for Microsoft 365: The PnP Management Shell Entra ID application has gone away. And it’s not coming back! You’ll now need to create an App Registration on every tenant that you want to use these tools on. Fortunately, both tools have created guidance to setup such a new application. There are some challenges however. This is how to solve one of them.
Challenges are a part of daily life. One might say that to live is equal to (===) wrestle with challenges! We forget that when things are easy for too long. In the same way we kind of got used to the PnP Management Shell app, which was a multitenant application. As consultants and system integrators, this was easy. We did not need to think about some things. We could just run Connect-PnPOnline, and one of the steps of signing in would be to accept the permission scopes of the PnP Management Shell app on that tenant. A done deal! But then the weather changed. And while less easy, it’s certainly better from several angles: We’ll now need to create an app registration for every tenant we work with.
As a Microsoft 365 architect, I work with multiple customers. If I want to run just one line of PnP PowerShell scripting, I now have to generate an App Registration for that tenant. The process is easy. I just run this commandlet and follow the instructions, which is basically: sign in and click OK a couple of times:
Register-PnPEntraIDApp -Tenant contoso.com -ApplicationName "PnP PowerShell" -Interactive
After registering, I can now sign in to the tenant using the regular Connect-PnPOnline commandlet. The difference with the past is that I now need to mention the Client Id / Application ID of the new App Registration:
Connect-PnPOnline -Url "https://contoso.sharepoint.com/sites/sales" -ApplicationId "ffb71693-fd59-4ca3-91cb-cc447dac49e9"
The rest works just like we’d expect it to. Aside from manually having to select and add the permission scopes we need. As the newly created App Registration only contains a couple of scopes.
Remembering them Id’s
The challenge with the above, to someone working with multiple tenants, is the following: I need to save those Client Id’s in a place and not forget them. Every time I sign into a tenant, I’ll need to get to that place, copy the right Client Id and paste it in my script. This can be quite annoying. How to work around that?
Solution 1: Create a multitenant application
What I could do, is create a multitenant application in my own company Entra ID. And use that when signing into customer tenants. This is essentially a little like what we had before. I’ll only have to remember one Client Id. This is nice, but as it stands I think I’ve grown to dislike multitenant applications. It’s just too easy to loose track of where such an application has been registered.
And also: anyone in the customer company might use that multitenant application to break something. So what about liability there? I may have given that application too much permissions because I needed that for another customer tenant, and now things are mucked up, because I did not align myself with the principles of Separation of Concerns and Least Privilege.
👉 No… I’m a proponent of separating concerns here. Let’s just create multiple applications.
Solution 2: Automate Client Id retrieval
A more secure approach would be to just automate things, and let PowerShell help me with getting the right Client Id. So I took an idea my colleague Bart-Jan Dekker thought of first, (Sharing is caring!) and adapted that for our current purpose.
The idea is as follows:
- We save the Client Id’s (Generated by the Register-PnPEntraIDApp commandlet) to the Windows Credential Manager. (Mac users can save it to the Keychain)
- We create a PowerShell commandlet that can find that Client Id while singing in.
- We add that commandlet to our PowerShell profile.
And that’s it.
Step 1: Adding the Client Id to the Windows Credential Manager
This step is easy. Just after registering our new application, we copy the Client Id and create a new Generic Credential:

I’m using the tenant name as the identifier and the Client Id as UserName. The password is not important, but it needs a value, so I’m just adding 1234 as a value. The result of this operation is that we can now retrieve this generic credential from powershell:

We can also use a script to do that. The script is probably useful as well for Mac Users, as I don’t own a Macbook, so I’m not super familiar with how the Keychain works. Here’s the script:
Add-PnPStoredCredential -Name "contoso" -UserName "ffb71693-fd59-4ca3-91cb-cc447dac49e9" -Password (ConvertTo-SecureString -String "1234" -AsPlainText -Force)
Step 2: Create a PowerShell commandlet
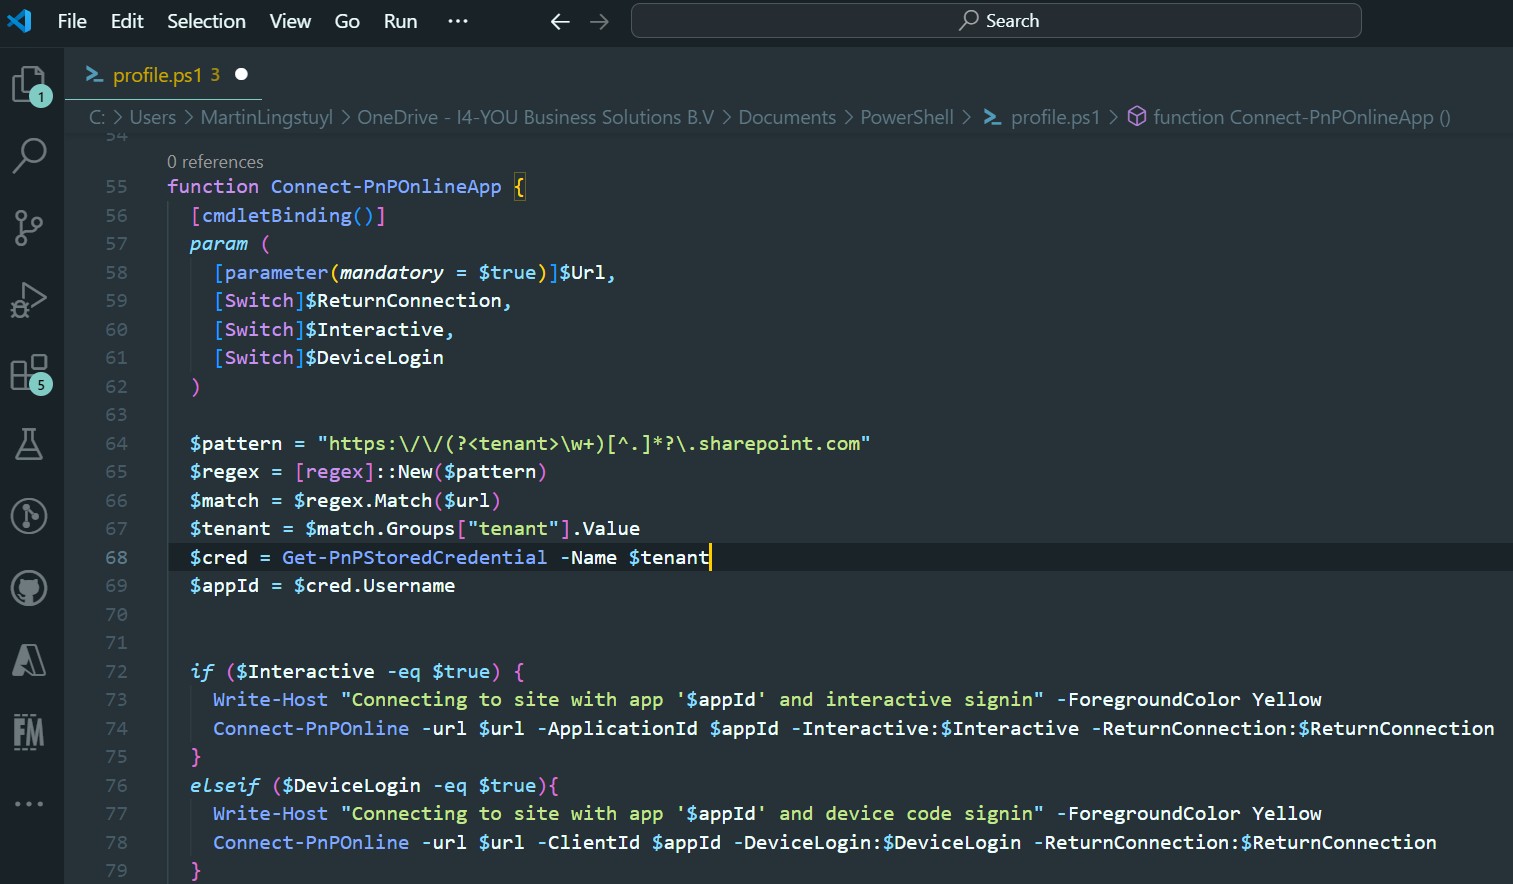
Okay, so the idea is that I want a very similar experience to Connect-PnPOnline. I want it to determine the tenant name based on the Url that’s used and get the correct Client Id from the Credential Manager. So I created the following script:
function Connect-PnPOnlineApp {
  [cmdletBinding()]
  param (
    [parameter(mandatory = $true)]$Url,
    [Switch]$ReturnConnection,
    [Switch]$Interactive,
    [Switch]$DeviceLogin
  )

  $pattern = "https:\/\/(?<tenant>\w+)[^.]*?\.sharepoint.com"
  $regex = [regex]::New($pattern)
  $match = $regex.Match($url)
  $tenant = $match.Groups["tenant"].Value
  $cred = Get-PnPStoredCredential -Name $tenant
  $appId = $cred.Username

  if ($Interactive -eq $true) {
    Write-Host "Connecting to site with app '$appId' and interactive signin" -ForegroundColor Yellow
    Connect-PnPOnline -url $url -ApplicationId $appId -Interactive:$Interactive -Tenant "$tenant.onmicrosoft.com" -ReturnConnection:$ReturnConnection
  }
  elseif ($DeviceLogin -eq $true){
    Write-Host "Connecting to site with app '$appId' and device code signin" -ForegroundColor Yellow
    Connect-PnPOnline -url $url -ClientId $appId -DeviceLogin:$DeviceLogin -Tenant "$tenant.onmicrosoft.com" -ReturnConnection:$ReturnConnection
  }
  else {
    Write-Host "Choose either -Interactive or -DeviceLogin to connect to site with app '$appId'" -ForegroundColor Red
  }
}
And that’s it. It uses a regular expression to get the tenant name from the Url. Gets the stored credential based on that name, and uses the Client Id from that credential to sign in. The commandlet does more or less what I use it for most of the time, it supports the Interactive and Device code sign in flows and it supports returning the connection. But you’re free to extend this if you like.
Step 3: Adding the commandlet to our PowerShell profile
So I’d like to run this commandlet without thinking. That is: in any PowerShell terminal, wherever I am. (In VS code or in PowerShell itself.) To do this I need to add the commandlet to the $profile, which is a reference to the PowerShell code file that is run when starting a new PowerShell session. It’s important to note that you’ll need the right $profile! I always use $profile.CurrentUserAllHosts, as that’s the path to the profile file that is loaded in every terminal host, be it VS Code or the PowerShell terminal itself.
So just execute the following in a PowerShell session to open this profile file in VS Code:
code $profile.CurrentUserAllHosts
Now paste the commandlet in there:

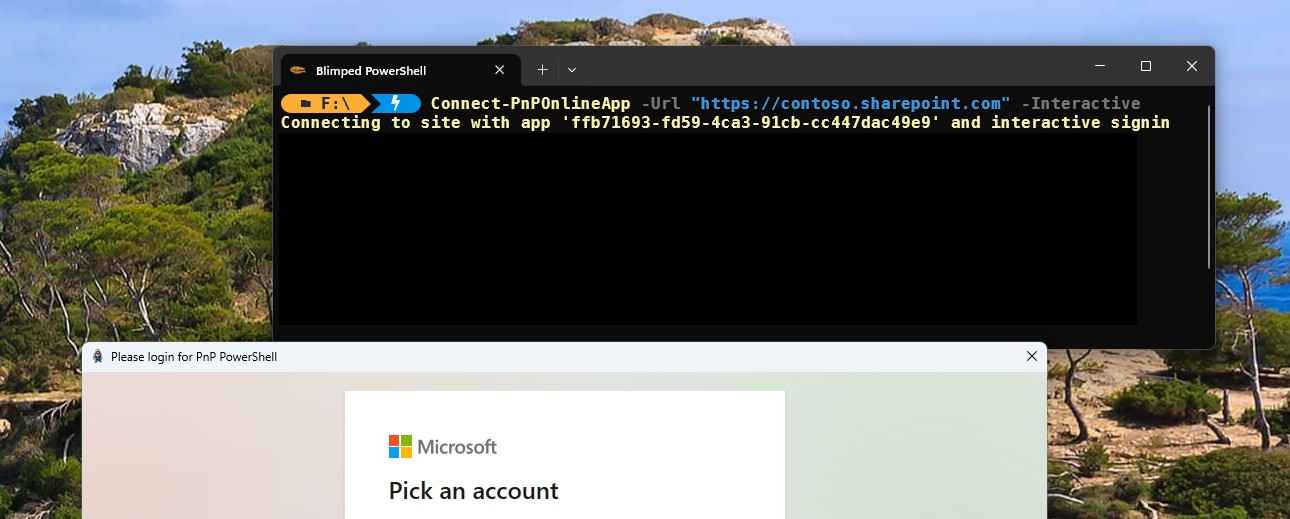
And that’s it. Save the file and quit VS Code. You can now start a new session in the PowerShell terminal and run your new commandlet. It should even be recognized by the PowerShell intellisense:

⚡Update 08-10-2024
The PnP PowerShell team is adding new functionality to make this workflow even easier. Checkout the Set-PnPManagedAppId commandlet. This commandlet is an alternative to Add-PnPStoredCredential, targeted at saving an app Id (and SharePoint URL) to the credential store. The idea is that it saves it in a specific format that Connect-PnPOnline can pick up while signing in. In this case you won’t need code in your $profile anymore, unless you have specific requirements to override the flow. At the moment of writing you’ll need the nightly release for this functionality.
Conclusion
And that’s how I did it. Using the PowerShell profile and the credential manager works really nice, even if I do not really save a password… just a Client Id. I hope I gave you food for thought. If you’ve got an even better idea, do let me know. I like to improve and learn!
Sources
- Changes for PnP PowerShell and CLI for Microsoft 365
- Getting started with PnP PowerShell - Installation and app registration
entraid pnp-powershell powershell
More
More blogs

Working with Microsoft Teams PowerShell in Azure Automation
How to work with Microsoft Teams PowerShell and Managed Identity in Azure Automation
Read more
Running applications with limited SharePoint permissions
Securing application access to SharePoint through Entra ID is easy, but how to access SharePoint using the principle of least privilege?
Read more
Updating and using the property bag in 2024
It's an old, but useful feature, and impacted by the change Microsoft is pushing with NoScript sites. Or is it? Here's how to use the property bag in 2024.
Read moreThanks
Thanks for reading

Thanks for reading my blog, I hope you got what you came for. Blogs of others have been super important during my work. This site is me returning the favor. If you read anything you do not understand because I failed to clarify it enough, please drop me a post using my socials.
Warm regards,
Martin
Microsoft MVP | Microsoft 365 Architect