The problem
Some time ago I needed to create a few webpart / extension solutions for a customer. I needed a central place to store some shared code, so I investigated using a SharePoint Framework (SPFx) Library Component. Having never actually done this, I headed up to the Microsoft Documentation Site and read up on the subject.
The documentation basically instructs you to create a separate SPFx solution. During development you can then use npm link to create a temporary link between the solutions, so you can debug and build them. The documentation is quite easy to follow. There was one problem though: I was using vs code dev containers to build the webpart solutions. One for the library component solution and one for the webpart solution. Dev containers are virtualized development environments based on docker containers, and henceforth have a separate filesystem. You cannot connect them to each other using npm link. It’s like I’m building them on two different PC’s altogether. A solution would be to add all the SPFx solutions in the same dev container, but this is not ideal as it would create dependencies between them. (node version, global yo version etc)
Docker and Dev containers are pretty standard these days. It’s ideal to separate tools and dependencies from each other. This is precisely what you would want when building multiple SPFx solutions as well. There might come a time when you want to upgrade one of the solutions to the latest version of SPFx and leave the other as it is. Docker containers are perfect for this. But it breaks the whole idea behind npm link. So how can you work around that?
Note:
I’ve created two GitHub repositories with demo SPFx solutions and the necessary dev container / yalc setup. You can use these repo’s to try out the solution in this blog. The readme’s contains instructions as well. Start at the Library Component Repo, and continue with the Webpart Solution Repo.
The solution: Shared folders and Yalc
The solution to this problem is using yalc. Yalc is a tool which was build precisely with this problem in mind: npm linking when you are using multiple separated file systems. The idea is basically as follows:
- Add a shared folder that all your dev containers can reach.
yalc publishyour Library Component to this folder.yalc linkthe Library Component from your Webpart solution.
Step 1: Add a shared folder that all your dev containers can reach
Let’s start at step 1. Docker containers are running separate file systems, so you cannot cd to a shared root folder. But you can mount an extra folder nonetheless. You’ll first need to ascertain where your files are located. Most people on windows PC’s probably clone their repo’s in one of two ways:
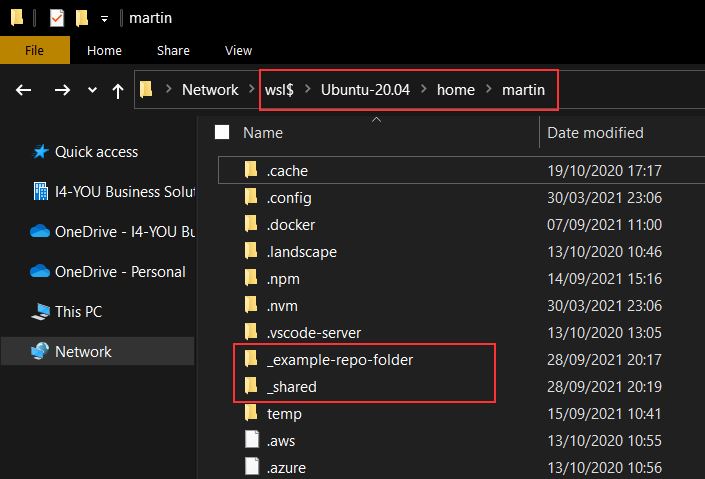
Repo’s in Linux root
Some people will just clone their solution in a folder in their linux file system. Locating your code is easy and you can just create a _shared folder in that same folder.
Repo’s in container volumes
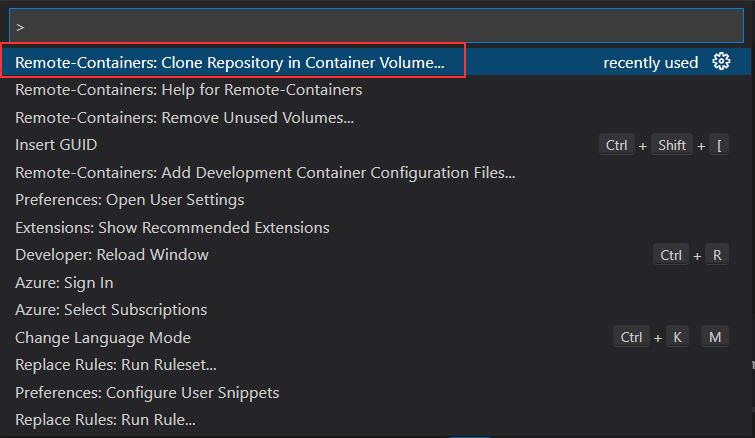
Other people will use the Remote Container extension in vs code to clone their repo in a unique docker volume. Using the command palette (Ctrl + Shift + P), you can easily access this feature:
Using container volumes has some I/O performance benefits over using your linux root. But it is a bit harder to find your files and create a shared folder. Using vs code remote explorer you can inspect your docker volume:
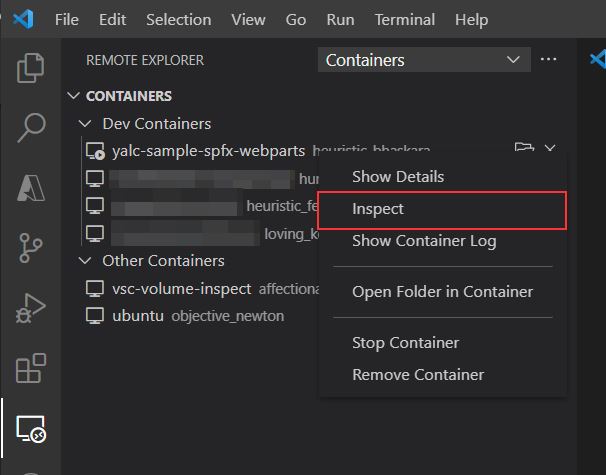
Doing that you would find your code to be located in a folder called ‘/var/lib/docker/volumes’:
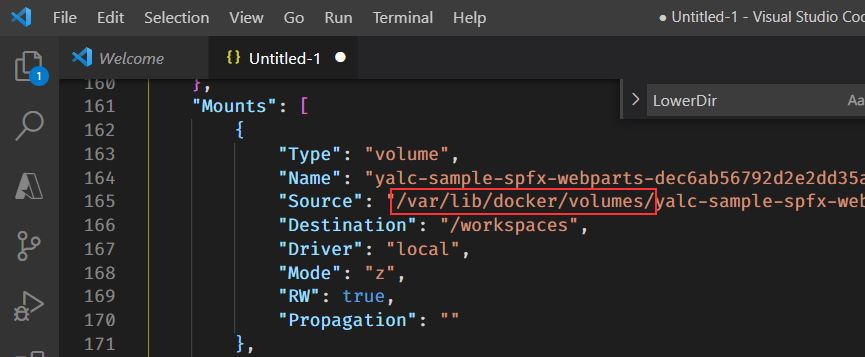
This folder is located in the Docker Host OS, which is linux, but I could personally not find it browsing through wsl$ in windows explorer. You can access it from a docker privileged container though. Privileged containers have root permissions, they can access the docker host system. A privileged container can be created by running the following docker command in a powershell or bash commandline:
docker run -it --privileged --pid=host ubuntu nsenter -t 1 -m -u -i sh
When the docker image is pulled and built, a commandline opens, and now you can navigate to the /var/lib/docker/volumes folder:
cd /var/lib/docker/volumes
Using the ls command, you’ll probably see a few folders now. These contain your repo files. Now you can create a _shared folder using the command mkdir _shared.
Having done this you can now edit the devcontainer.json files in your SPFx repo’s and add the following property:
//Add shared folder as a mounted folder to link libraries with webparts
"mounts": [
  "source=/var/lib/docker/volumes/_shared,target=/_shared,type=bind,consistency=cached"
]
This means that the _shared folder is now added as a mount. Now open the Command Palette and hit ‘Remote Containers: Rebuild Container’. You’ll need to do this for the webpart solution as well as the library component solution.
Step 2: Yalc publish your Library Component to this folder
Having created the shared folder, it’s time to start working the SPFx side. You should have two instances of vs code opened, one with your Library Component solution folder and one with your webpart solution folder, using the remote container extension. If necessary, use the tryout repo’s I’ve provided. You’ll need to npm install yalc globally in both containers:
npm install yalc -g
Open the library component solution and execute a gulp bundle. Now execute:
yalc publish . --store-folder /_shared
This will publish the built package to the _shared folder, so that it can be linked from the webpart solution. If you inspect your _shared folder you’ll now find a lot of files in there. Time for the last step.
Note:
You’ll need to execute this command every time you update the library code and run gulp bundle. It would be possible to automate this somewhat, but that’s not the object of this blog, I did add some guidelines to the repo readme's.
Step 3: Yalc link the Library Component from your Webpart solution
Now open the webpart solution vs code window. Take care that you have npm installed yalc globally and rebuilt the container after adding the mount property.
Now run the following command:
yalc link <package-name> --store-folder /_shared
This will instruct yalc to link the package. That’s it! You should now be able to reference the library code as you would if you would have used npm link.
Note:
You’ll need to add a few lines to the .gitignore file: ‘yalc.lock’ and ‘.yalc’ to take care that yalced files are not committed to the repo.
Conclusion
I hope my search may help some people when using library components. To make things easier, I have created two github repo’s containing devcontainer/docker files and an empty SPFx solutions. This may get you up to speed when experimenting with this.
Tryout setup
Sources
- npm yalc package
- Documentation - Getting started with cloning in docker volumes
- Article - Where are docker files stored
spfx docker npm
More
More blogs
Using custom certificates when debugging SPFx Solutions
Are you often debugging SharePoint Framework solutions in a devcontainer? Upgrade your dev workflow by using custom localhost certificates!
Read more
SharePoint Framework (SPFx), Authenticating to Api’s and Third Party Cookies
About SharePoint pages that refresh and reload when your webpart is on it, and what that has to do with Authentication and Third Party cookies.
Read more
Extending Microsoft 365 with custom retention controls - Part 2
New release of a small Microsoft 365 extension I've developed to view & manage retention controls.
Read moreThanks
Thanks for reading

Thanks for reading my blog, I hope you got what you came for. Blogs of others have been super important during my work. This site is me returning the favor. If you read anything you do not understand because I failed to clarify it enough, please drop me a post using my socials.
Warm regards,
Martin
Microsoft MVP | Microsoft 365 Architect