Using the available gulp trust-dev-cert command, we can generate a certificate for use when debugging SPFx solutions. When running in a devcontainer on Windows though, it’s actually easier to use your own localhost certificate. This is how you can do that.
Table of contents
Scenario
Executing gulp trust-dev-cert in SPFx solutions running on Windows is a breeze. It creates a certificate and installs it for you into your Windows certificate store. If you are a fan of Docker and devcontainers, like me, it’s a bit more complex. The gulp command will generate a certificate in the following folder: $home/.rushstack/, but as it is running within a linux context, it will not be able to auto-install it in your Windows certificate store. The idea is that you can execute a few steps to still do that:
- Run
gulp trust-dev-cert - Run
cp $HOME/.rushstack/rushstack-serve.pem rushstack-serve.pemto copy the certificate file into your SPFx solution root folder. - Download the file to your Windows machine using the VS code context menu.
- Open your Windows certificate manager and manually import the certificate into the ‘Trusted Root Certification Authorities’ folder.
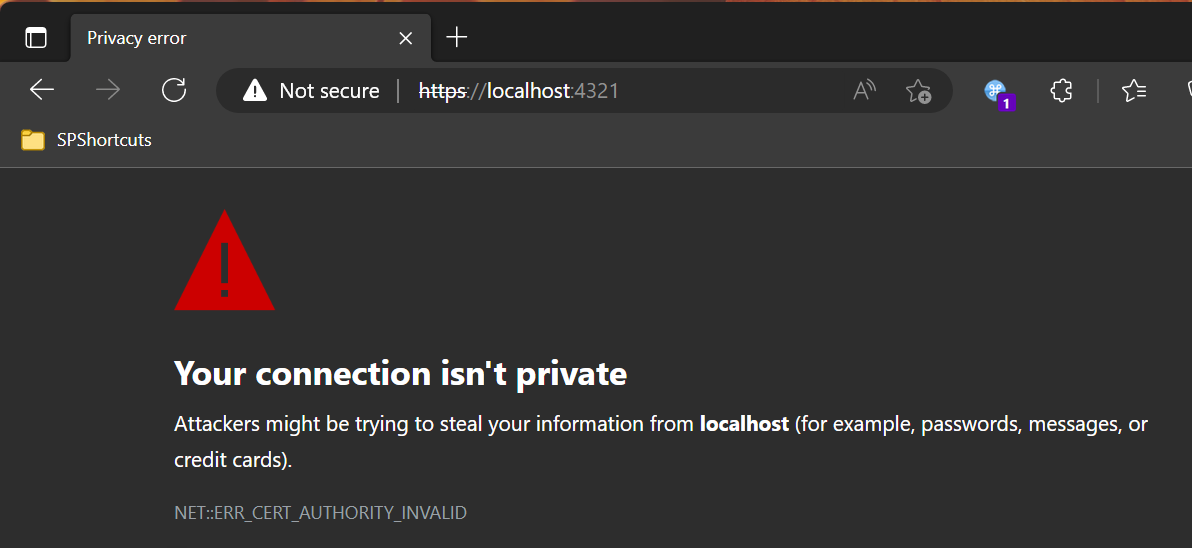
This however is a a lot of steps that you have to repeat for every new SPFx solution. Oh, and a minor point: it does not work on my machine! I still get the dreaded certificate error:
The solution
It’s actually a lot easier to generate your own certificate and copy that into your SPFx solutions. This involves a few one-time steps to create the certificate. After that you can re-use it for every SPFx solution you create. 💪 Easy-peasy!
For this occasion I found a great gist guide to create a custom localhost certificate with root CA.
Note:
You'll need to install the OpenSSL toolkit to get this working. The easiest way to install it is through winget or chocolatey.
This is how it works:
Step 1: Generate and trust a CA root certificate using OpenSSL
First you create your own CA root certificate:
openssl req -x509 -nodes -new -sha256 -days 1024 -newkey rsa:2048 -keyout RootCA.key -out RootCA.pem -subj "/C=NL/CN=Blimped Root CA DEV"
openssl x509 -outform pem -in RootCA.pem -out RootCA.crt
You’ll see three RootCA certificate files have been created on your disk. Right click the RootCA.crt file and click install. Follow the wizard and install the certificate into the ‘Trusted Root Certificate Authorities’ folder.
Step 2: Generate a localhost certificate based on the Root Certificate
First create a text-file called domains.ext with the following contents. Save it on your disk to the location where your RootCA files have just been created.
authorityKeyIdentifier=keyid,issuer
basicConstraints=CA:FALSE
keyUsage = digitalSignature, nonRepudiation, keyEncipherment, dataEncipherment
subjectAltName = @alt_names
[alt_names]
DNS.1 = localhost
Now execute the following OpenSSL commands to create a localhost certificate based on the domains.ext file and the Root certificate:
openssl req -new -nodes -newkey rsa:2048 -keyout localhost.key -out localhost.csr -subj "/C=NL/ST=CloudState/L=CloudCity/O=Blimped/CN=localhost.local"
openssl x509 -req -sha256 -days 1024 -in localhost.csr -CA RootCA.pem -CAkey RootCA.key -CAcreateserial -extfile domains.ext -out localhost.pem
Step 3: Copy/paste the certificate contents
The last step is to copy the certificate to the exact location in your SPFx solution where gulp trust-dev-cert normally creates them. The easiest way to do this is to copy the contents in the following way:
In your Windows terminal:
$dataPem = Get-Content .\localhost.pem -Raw
$dataKey = Get-Content .\localhost.key -Raw

$script = @"
echo '$dataKey' > `$HOME/.rushstack/rushstack-serve.key
echo '$dataPem' > `$HOME/.rushstack/rushstack-serve.pem
"@
$script | Set-Clipboard
In your devcontainer terminal
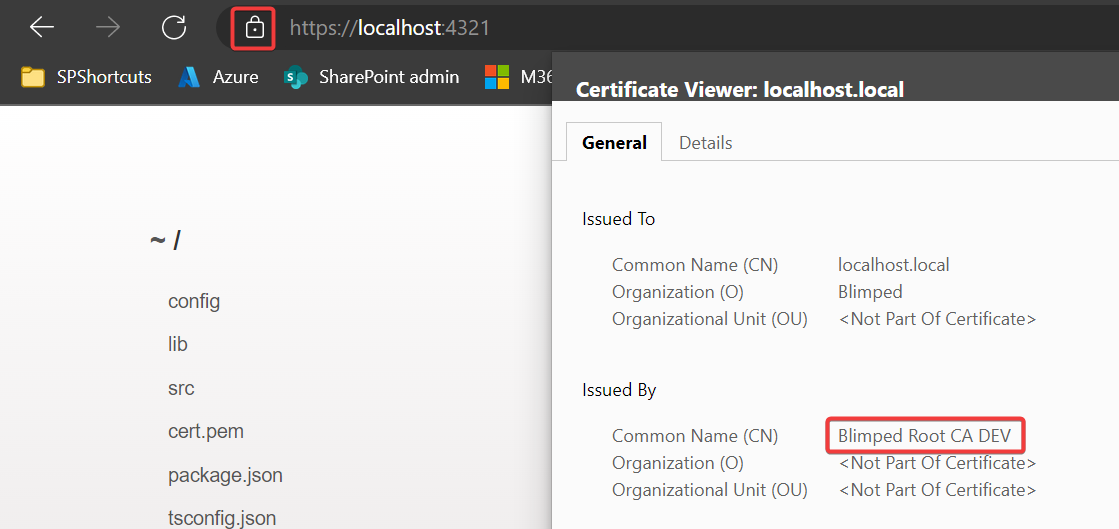
Now head over to your VS Code devcontainer instance, open the terminal and just hit Ctrl + V to paste the script you’ve got on your clipboard. And hit enter one last time. The certificate contents are now saved to the correct files in your .rushstack folder. You can now hit gulp serve and start debugging safely and securely. If all is well, you’ll now see your own certificate featured:
Concluding
Using your own certificates in an SPFx devcontainer is much easier than generating them using the gulp tool. Step 1 + 2 written above need only be executed once. you can save your localhost certificates somewhere safe. Everytime you start a new SPFx project, just run step 3 again, copying the certificate into your new devcontainer.
🌤️ Happy serving!
Sources
- Microsoft Docs - Trusting the self signed dev certificate
- Gist - Create localhost certificate
- OpenSSL
- OpenSSL on WinGet
- OpenSSL on Chocolatey
spfx docker
More
More blogs
SharePoint Framework, Docker, Dev Containers and NPM linking
When using SPFx Library Components we are instructed to execute npm link when debugging our webparts. But what if we are using dev containers?
Read more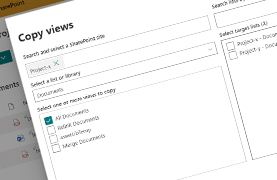
How to copy views in SharePoint
There's currently no way to copy list and library views in the SharePoint UI. I've created a SPFx sample demonstrating how it can be done using code.
Read more
Contributing as a holiday season present
Last month I contributed to an Open Source project: CLI for Microsoft 365. I did that both because I love using CLI's and because I love not reinventing wheels.
Read moreThanks
Thanks for reading

Thanks for reading my blog, I hope you got what you came for. Blogs of others have been super important during my work. This site is me returning the favor. If you read anything you do not understand because I failed to clarify it enough, please drop me a post using my socials.
Warm regards,
Martin
Microsoft MVP | Microsoft 365 Architect