
I was recently creating a script that would need to connect to Microsoft Teams using Managed Identity in an Azure Automation Runbook. I used the Microsoft Teams PowerShell module and tried out a few routes before being succesful. In this blog post I’ll share my findings and the steps I took to get it working.
Table of Contents
How to set it up
Step 1: Enabling Managed Identity
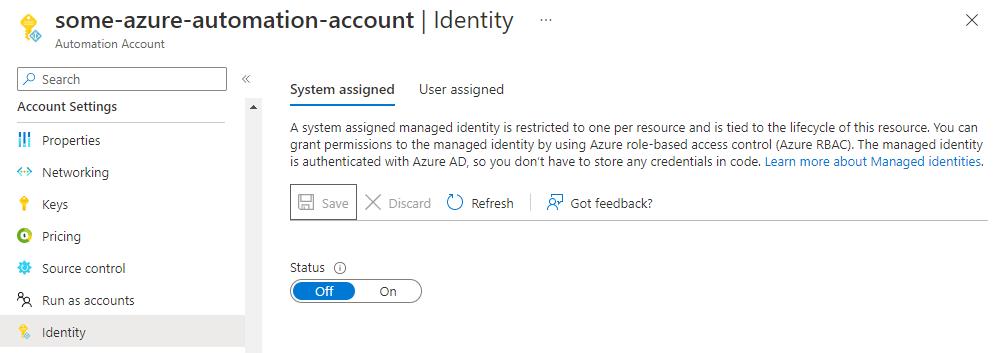
Enabling Managed Identity is as easy as it is on any resource. Just open the Automation Account and click on the Identity blade. You can enable a System Assigned Managed Identity by switching a simple toggle. If you want to use a User Assigned Managed Identity, you can add one by clicking on the Add button. In that case you’ll need to have created a managed identity resource first though.

Enabling managed identity will create a Service Principal in Entra ID, that you can assign permissions and roles. Copy the object Id of the Service Principal from the identity blade and add it to your Automation Account variables. You’ll need it later on.
Step 2: Adding permissions
Adding permissions to service principals cannot be done using the Entra ID Portal currently. You’ll need a scripting tool for that. I personally like to use the CLI for Microsoft 365 for this.
I’ve used the documentation to add all permissions that can be used. But it’s also possible to just add what you need, which is a good thing in the sense of the ‘Least Privilege’ principle.
You can execute the below script to add the permissions:
m365 login

# Use the object Id of your system/user assigned identity here
$appObjectId = "25a56900-360d-41d9-83e5-02385a63b04c"

# Define the permission scopes you want to add
$scopes = "Organization.Read.All,User.Read.All,Channel.Delete.All,ChannelSettings.ReadWrite.All,Group.ReadWrite.All,ChannelMember.ReadWrite.All,AppCatalog.ReadWrite.All,TeamSettings.ReadWrite.All"

m365 entra approleassignment add --appObjectId $appObjectId --resource "Microsoft Graph" --scopes $scopes
Using the Azure Cloud Shell
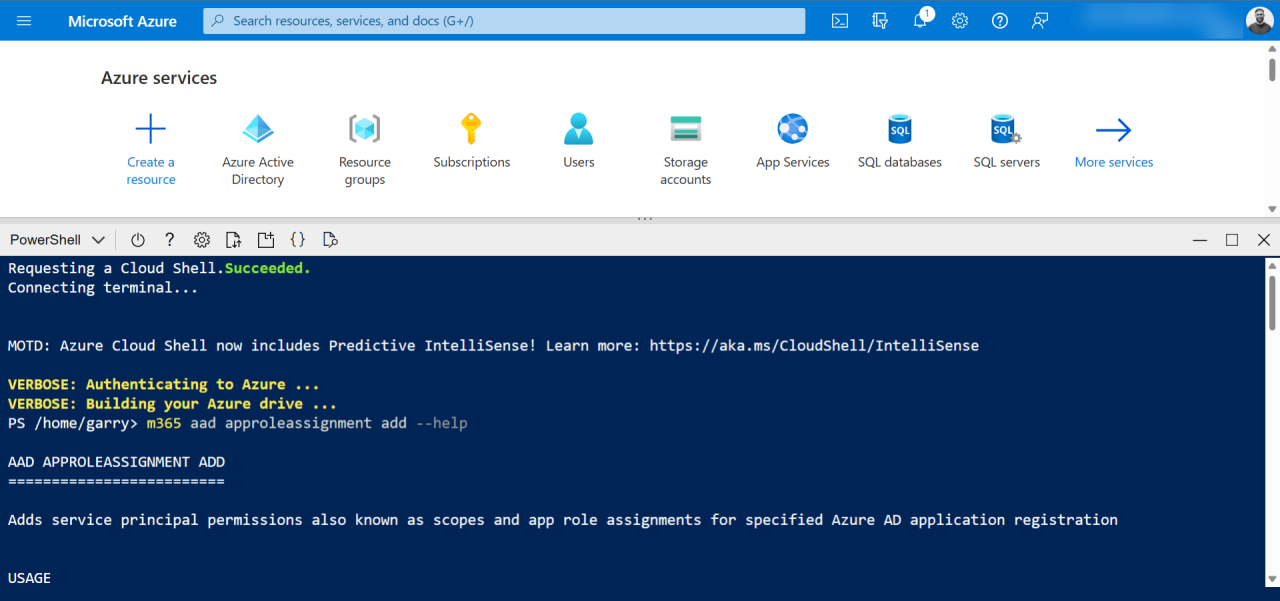
The CLI for Microsoft 365 can be installed on your local machine, but if you don’t have it, you can even use it from the Azure Portal by opening the Azure Cloud Shell. No install required. The CLI for Microsoft 365 is installed there by default. Do not forget to login first in the Cloud Shell as well, using m365 login, it will not login automatically for you.

Thanks Garry Trinder for reminding me!
Step 3: Adding an Entra role
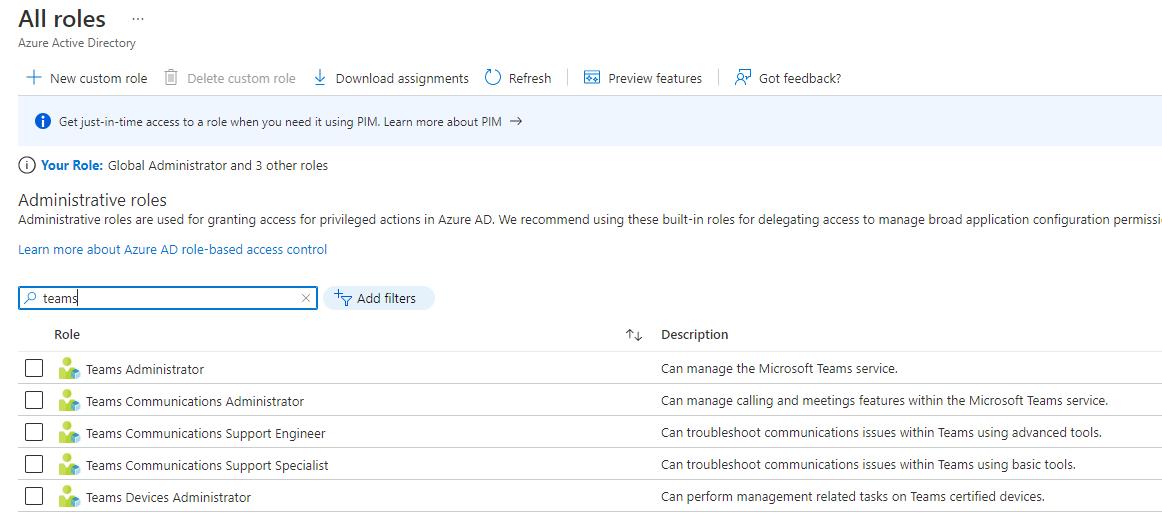
Aside from adding permissions, you’ll also need to add an Entra role to the Service Principal. This is done in the Entra ID Portal. Open ‘Entra roles and administrators’ in the Azure Portal, find and open the ‘Teams Administrator’ role and add the service principal to that role.


…you’ll find your way from here, right? 😁
How to connect using Managed Identity
Ok! So having enabled an identity, and added permissions and a role, you can now start connecting to Microsoft Teams. Make sure you have added the MicrosoftTeams PowerShell Module in the Azure Automation Account. You can do this by going to the Modules blade and clicking on the Add a module button.
You can use the Connect-MicrosoftTeams cmdlet to do this:
1. Using System Assigned Managed Identity
Using System Assigned Managed Identity is the easiest route. The following script should render a nice message about how many Teams you have in your tenant.
Connect-MicrosoftTeams -Identity

$teams = Get-Team

Write-Output "Found $($teams.Count) teams"
2. Using User Assigned Managed Identity
When using a User Assigned Identity, you need an extra -AccountId option to help the module select the correct User Assigned Identity. You can use the Object Id or the Client ID of the Service Principal. I’d suggest you store these in the variables of Azure Automation Account and script it as follows:
$identityObjectId = Get-AutomationVariable -Name 'UserAssignedIdentityObjectId'

Connect-MicrosoftTeams -Identity -AccountId $identityObjectId

$teams = Get-Team

Write-Output "Found $($teams.Count) teams"
This route was not at all obvious to me, I knew you need to add a reference to the service principal, but the -AccountId parameter was not well documented. Plus the Connect-MicrosoftTeams cmdlet does have an alternate -ApplicationId parameter that can be used for app only connections. But this parameter can only be used in combination with a certificate, and I wanted to use Managed Identity instead. I concluded that it wasn’t possible to use User Assigned Identity yet.
But fortunately I did one extra test, using the -AccountId parameter, and was proven wrong. 🎉
3. Using Access Tokens
Another route is to use the -AccessTokens parameter. This allows you to pass two access tokens that you need to retrieve manually. One access token for the Graph and one for the Teams service principal. You can use the following script to do this:
function Get-AccessTokenUsingManagedIdentity($url) {
    $identityObjectId = Get-AutomationVariable -Name 'UserAssignedIdentityObjectId'
    $endpoint=$env:IDENTITY_ENDPOINT
    $header= $env:IDENTITY_HEADER
    $response = [System.Text.Encoding]::Default.GetString((Invoke-WebRequest -UseBasicParsing  -Uri "$($endpoint)?resource=$url&api-version=2019-08-01&object_id=$identityObjectId" -Method 'GET' -Headers @{'X-IDENTITY-HEADER' = "$header"; 'Metadata' = 'True'}).RawContentStream.ToArray()) | ConvertFrom-Json
    return $response.access_token
}

$graphToken = Get-AccessTokenUsingManagedIdentity -url "https://graph.microsoft.com"
$teamsToken = Get-AccessTokenUsingManagedIdentity -url "48ac35b8-9aa8-4d74-927d-1f4a14a0b239"

Connect-MicrosoftTeams -AccessTokens @("$graphToken", "$teamsToken")

$teams = Get-Team

Write-Output "Found $($teams.Count) teams"
As you can see, this code uses the manual route to retrieve Managed Identity Access tokens for Azure Automation. I learned this from Rodrigo Pinto, alias Scoutman. Read his post here. It’s a very handy function that can also be used for Azure Function apps. You can use it with System Assigned as well as with User Assigned Managed Identity. The 48ac35b8-9aa8-4d74-927d-1f4a14a0b239-guid is the client Id of the ‘Skype and Teams Tenant Admin API’ service principal. This is globally the same for all Microsoft 365 tenants.
Initially, I got a lot of odd errors when using my manually retrieved tokens in this way:
IDX14102: Unable to decode the header 'System.String' as Base64Url encoded string. jwtEncodedString: 'System.String'.
The input is not a valid Base-64 string as it contains a non-base 64 character, more than two padding characters, or an illegal character among the padding characters.
I checked out my tokens and am certain that they where correct. Copying the access tokens and running the same command on my local PC even worked! It looked like more people had these issues with the -AccessTokens parameter, so I just ignored it. But then today, when writing this blog post, I checked it again, with the purpose of copying the exceptions, AND IT SUDDENLY WORKED!! 🤯
Who knows what went on here. Some internal Microsoft magic, I guess. If you can’t get it to work: never mind, try route 2.
Conclusion
Using Managed Identity is a great way to connect to Microsoft Teams. Once you know what you’re doing, it’s easy to set up, and you don’t need to worry about storing credentials. Once you know what you’re doing… I’m hoping this post will help some people get there faster.
Thanks for reading and happy coding!
Sources
- Microsoft Docs - Connect-MicrosoftTeams
- Microsoft Docs - Application-based authentication in Teams PowerShell Module
- Microsoft Docs - Use Microsoft Teams administrator roles to manage Teams
- CLI for Microsoft 365 - Assigning permissions to service principals
- Microsoft Docs - Managed Identity REST endpoint reference
- Scoutmans post on Managed Identity in Azure Automation
auth teams powershell azure entraid
More
More blogs

Using the on-behalf-of flow in Azure PowerShell Functions
A step by step guide on how to use the on-behalf-of flow in Azure PowerShell Functions.
Read more
Release Branch Strategies in CI/CD with Federated Identity - GitHub edition
Learn how to secure SPFx deployments using GitHub Actions and Federated Identity with release branch strategies. A deep dive into flexible federated credentials for effective CI/CD security.
Read more
Deploying to Microsoft 365 using the CLI and federated identity - DevOps edition
Learn how to properly deploy artifacts from Azure DevOps Pipelines to Microsoft 365 using the CLI for Microsoft 365 without fiddling with certificates or user credentials.
Read moreThanks
Thanks for reading

Thanks for reading my blog, I hope you got what you came for. Blogs of others have been super important during my work. This site is me returning the favor. If you read anything you do not understand because I failed to clarify it enough, please drop me a post using my socials.
Warm regards,
Martin
Microsoft MVP | Microsoft 365 Architect